
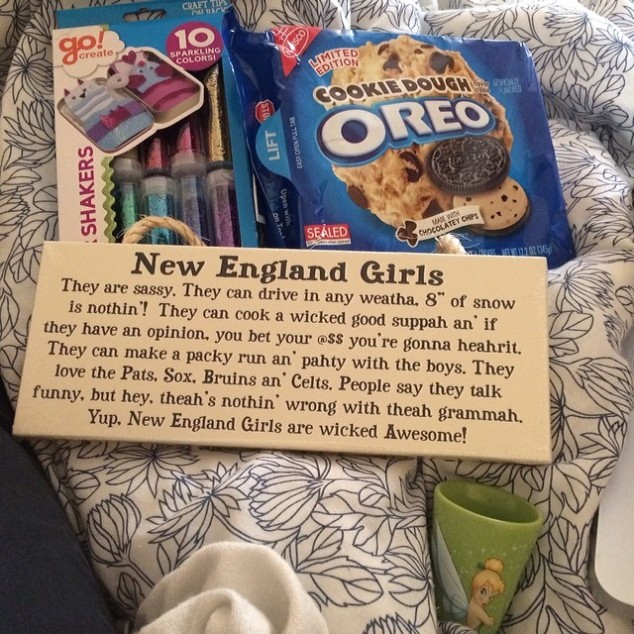
Sweet package from @trillian24! Thanks so much!!! Seriously thank you thank you thank you! #glitter #newengland #oreos #shotglass #iloveanniek! #expatlife #americaninamsterdam

Sweet package from @trillian24! Thanks so much!!! Seriously thank you thank you thank you! #glitter #newengland #oreos #shotglass #iloveanniek! #expatlife #americaninamsterdam
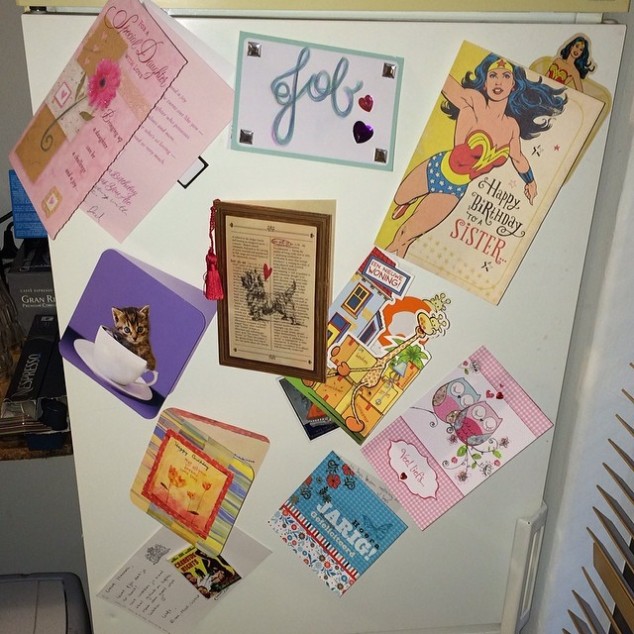
Look at all the cards we have gotten!!! #cardfridge #snailmail #mail #post #usps #postnl #sendussomelove!!!
So first thing is first. A new look.
We have really been wanting a simpler, more appealing blog layout. We worked hard all last week going through hundreds of layouts until we found this one which we think is simple, but still fun! We hope you enjoy it as much as we do!
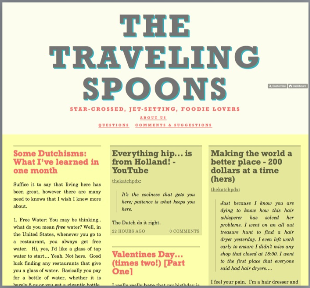
So we no longer look like this^^
We’ve been cooking a lot and have a huge backlog of stores to tell you. Right now I’ve been gearing up again to start working and getting myself prepared for that. Job has obviously been working so we are working to fit in time on our days off to keep you up to date and posted on our amazing meals.
I’ve also started running so that has been occupying my time a bit more.
Yesterday I also went to my first Meetup.com meeting for “Unemployed Expats”. I had signed up for the meet up before I had my job and was really interested in meeting some new people because in all honestly, I don’t have really any friends here besides Job and a few of Job’s friends…who are primarily obviously his friends, not mine. (For those of you reading this, please do not take that the wrong way as I love you all as well. I’m just stating a fact.) It’s really nice to meet other expats because both you and they understand the struggle of fitting in to Dutch society, where as speaking with someone who is Dutch can’t quite relate on the same level unless they’ve been an expat elsewhere. I’ve joined a few of the other expat meetup groups, however most of them are late at night or at bars or clubs which really isn’t my scene. I’d prefer to go out and have a nice cup of coffee to just chat and get to know someone in the morning or afternoon.
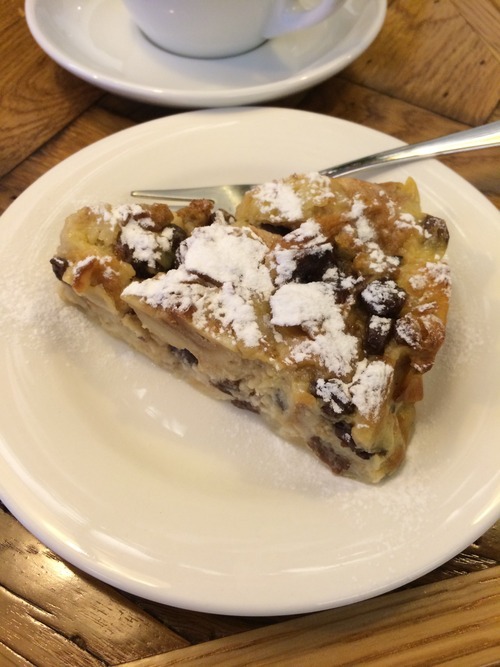
Anyways, I met some lovely people at the meetup and we met at Harvest and Company which is a very cute cafe/antique/furniture shop off of the Overtoom. The coffees, teas, and baked goods were all delicious! I had a cappuccino and a bread pudding. The interior of the cafe is very home-y and relaxed and as I watched people come in for their coffees and teas, everyone was so friendly and there was such a lovely atmosphere. They all greeted and said hello to one another and it was just a very happy feeling all around.

After the Meetup, I met Job for lunch and we got some lovely bagels at Bagels & Wraps. I love the Dutch Bagel. Job usually gets the Valley Girl or a Tuna Melt. For the amount of times we go here, I strangely have no photos of the bagels, but they’re delicious!
From lunch, we took a nice little walk around the area. It’s really starting to become spring here!

Crocuses are popping up everywhere!

After our walk, Job had to get back to work. I stuck around for another hour (I had a meeting with one of the managers for work an hour later) and first walked by this huge chess game…
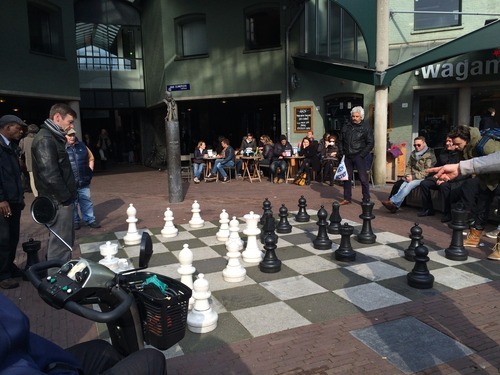
and then went to people watch in Vondelpark until the hour had passed. An ominous cloud sat above me.

Unfortunately it did start to rain. I found some refuge and the rain passed quickly. I went to my meeting, had a nice chat, and then went home.
A few hours later, Job came home and we cooked up some dinner and relaxed together which was really nice.
We watched some Gordon Ramsay before bed and it was a good night.

#sunset #daythree #dusk #beautifulsky #thetravelingspoons #thirdfloorbalcony @thetrvlngspoons @jobbeumer
So we’re going to change it up a bit in hopes that Job will get more of an opportunity to write about the things he makes with our “new” segments, Cooking with Him and Cooking with Her. With that being said, welcome to Cooking with Her – Gnocchi. (We got the title idea from these awesome bloggers thekatchpdx, who denote each of their blog posts with him or her so you know who writes them. Thanks again!)
Be forewarned, this is the proudest cooking moment of my short cooking career. For those of you that know me, I am in no way a cook. Most of you would probably put me in the category of “Hannah doesn’t know how to cook (but she can make damn good cookies)” I, myself, would say I was there as well.
About a week ago, I found out that maybe I could take myself out of that category.
Anyways, last week we bought 10kg of potatoes. They were on sale. After the potato purchase, we sat down and had a serious conversation about how we were going to use up 10kg of potatoes in just a few weeks. Obviously, Stamppot was going to be on the menu a few times, but I thought to myself, what else is a main dish that uses potatoes… and then it came to me…GNOCCHI!
Now at first I thought that this was pretty ambitious. I knew nothing about pasta making, and even less about gnocchi. I did what any normal person in this day and age would do… I googled it.
This first thing I came upon was this (first recipe). I read through the instructions and thought, hey… this doesn’t seem super awful. I think I can do this. I read a few of the comments for suggestions on recipes as I always do to find out ways to make the meal better and stumbled across this (second recipe).
With both of those websites in hand, it was time to get ready to work.
Now, the original plan was to make the gnocchi with Job, but as you know, potatoes take forever to prepare and so I wanted to get a jumpstart on the action so that we could get right to it when Job got home from work. So I got down to work.
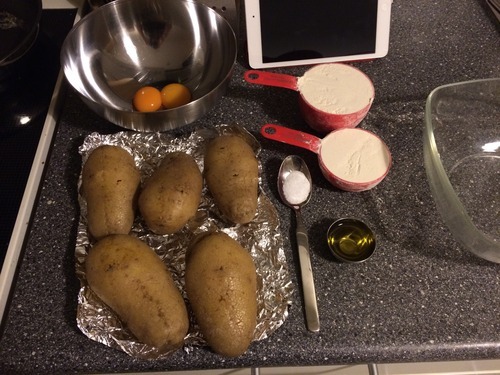
Ingredients:
The first thing I learned about gnocchi is that water is not your friend! Water will make the gnocchi gummy and not have the correct texture. The only time you want water is when you’re ready to boil these bad boys up for your meal.
The first set of instructions suggested you boil the potatoes to cook them. The second set suggested you bake the potatoes to avoid dealing with water. I heeded the advice of the second recipe because I have no faith in myself when it comes to cooking. Then I had to look up how to bake a potato because this is how much I actually know about cooking. Nothing.
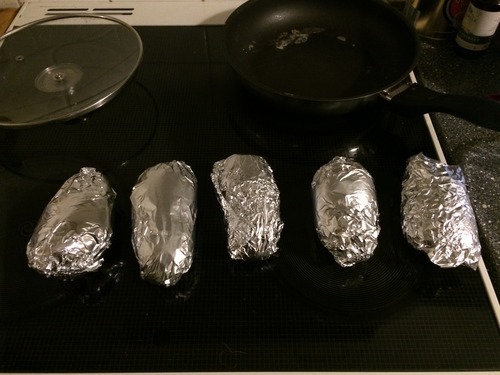
Anyways, after looking up how to bake a potato (dear google, thank you for not letting me down… and Diane for your cut and dry instructions (I liked Diane’s answer the best)) I prepped my potatoes by kind of rinsing them (I was still weary of the water) and then created a dotted line with fork punctures the length of the potato and put it in tin foil to bake. I believe I baked them at around 200C for about an hour to an hour and a half. Like I said. I really had no clue what I was doing. I tried to time it well enough so that when the potatoes were done, Job would just be walking in the door from work. My timing was off.. which is how I ended up making this dinner myself.
According to the second set of instructions, everything melded together better when the potatoes were hot, so I just kept making the gnocchi despite the fact that Job probably wouldn’t be home for at least a half hour more.
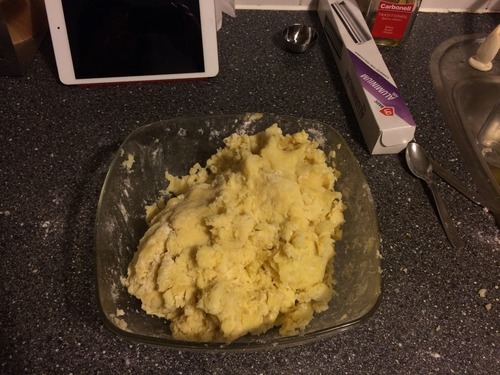
When they came out of the oven, I carefully peeled off the skin. I found that by pressing on the skin and pulling away from the center fork perforations, the skin just peeled back with ease. I went about all of the potatoes and peeled them and put them into a big glass bowl.
From there, I first used my masher and then went down to a fork. The first recipe recommends a potato ricer (I don’t have one of those) and the second one used a pastry cutter (I don’t have one of those either) so I used a fork which was the fallback method for both recipes. This mashing part is super important because you really need to make sure there are no chunks of potatoes left by the time you’re done mashing. If there are, then you will have chunks in your gnocchi and that is no good. So really get in there with that fork and mash, Mash, MASH! While I was mashing, I added in my olive oil which recipe two suggested. It helps to somewhat moisten them and makes it slightly easier to mash.
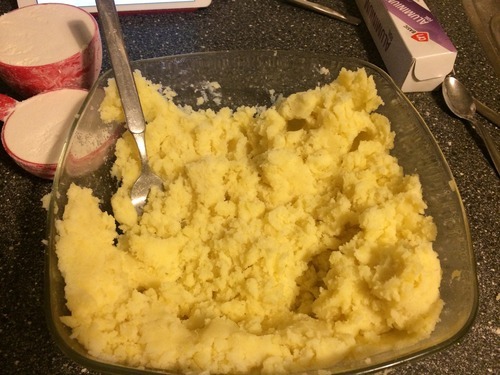
Looking over both recipes, I think that I forgot to beat my egg yolks before I added them to the potato mixture.. but I can’t quite remember. Anyways, according to both recipes, you’re supposed to beat the eggs first. I think I just poured them in and stirred the mixture until it was all the same color. From there I added the flour and salt and got to work with my hands because I knew otherwise there would be flour all over the kitchen.
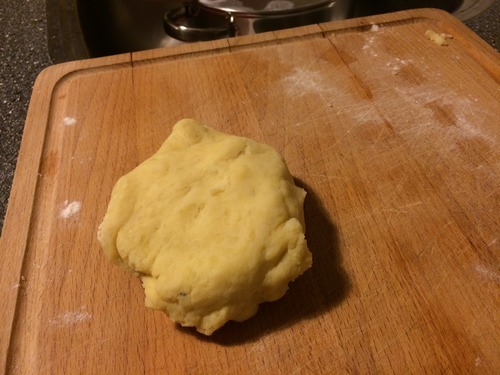
Once everything was mixed all together, I got out our wooden cutting board and sprinkled some flour on there and plopped the dough out of the bowl. I kneaded it a few times (at this point I was sort of following directions/sort of making up how to knead because I did not follow recipe one’s instructions for sure. I kind of just kneaded it a few times and decided I was done. I was afraid of over-kneading because you don’t want to do that either.) Over-kneading causes the gnocchi to become tough and rubbery.
Please excuse me here for a moment because I actually completed this whole blog post and it was fantastic. When I went to queue it up, Tumblr froze and I was fortunate enough to take a screen capture of my blog post, and I had copied and paste the first half as I was getting ready this morning. I’m glad I have that screen capture, because I was really getting into the post. So lucky for you, I can retype that last half. Unfortunately, I lost a few paragraphs here in the middle which I’m sad about. The portion up until this point was luckily saved in a document on my desktop. End rant.
Anyways, the dough got kneaded. The next instruction was to place it back in the bowl and cover with a towel, however, the instruction did not state how long it had to be covered for, so I placed my towel over the dough in the bowl and took this opportunity to clean everything that I had used and was now done with.
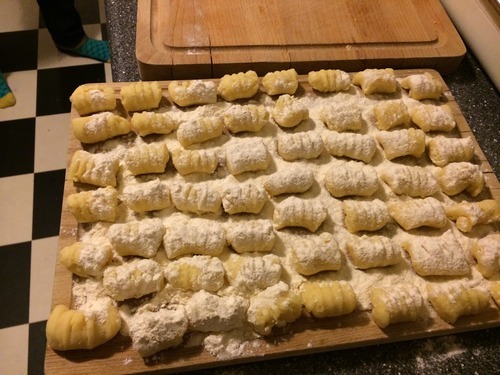
After that short clean up, I went back to the board and refloured it in order to start making my gnocchi. At this point, I grabbed a lemon-ish sized blob of dough to start rolling. This next step requires you to think back to your play-doh days and roll out that dough like a play-doh snake! Roll it until it is about one inch in diameter or about the size of a quarter. From here, it’s cutting time. I just cut about one inch squarish pieces, or pillows, because they look like pillows once you cut them.
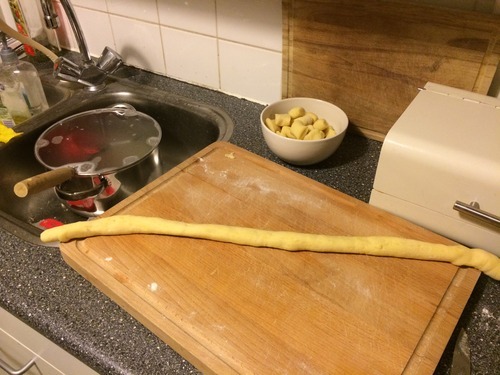
I proceeded to roll out all of my dough (it ended up being about five or six lemonish sized grabs of dough). Once all of my dough was cut into pillows, I had to ridge the gnocchi so that our sauce would stick. This was probably the most difficult part of the whole gnocchi making process. The first recipe had this video to help show you how to make the ridges on the gnocchi. Even with the visual aid, it took me a little bit to get a handle on it, and I kind of made up my own way.
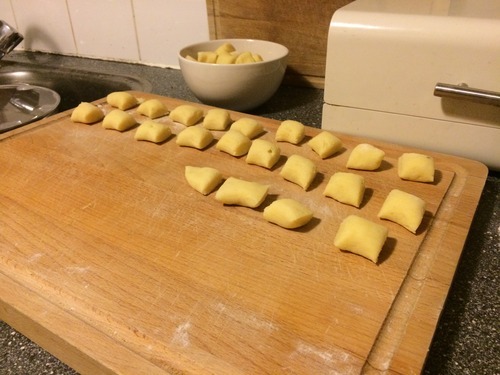
To ridge my gnocchi I used a nice normal fork. I placed the tines on the counter and held the handle in my hand, making the fork perpendicular to the counter. I placed the pillow of gnocchi dough right in the center of the tines and smushed the dough against the tines to get the imprint of the them. Then, starting at the top of the tines, where they meet the fork handle, where the top of my gnocchi was sitting, I used my index finger to just roll the dough onto itself and off of the end of the fork tines. I think if you use this description and then also watch the video, you’ll be able to figure it out and find a method that works best for you.

After ridging all of the gnocchi, you have two options. You can either cook the gnocchi or freeze it (or in our case, do both, because we had enough for a second night’s dinner).
Cooking the gnocchi is the easiest part of the whole project. Boil a pot of water with some salt in there. (I think ours was salted water, but honestly can’t remember.) Wait until the water is at a rolling boil. If you add the gnocchi too soon, it soaks up too much water and doesn’t taste right and gets kind of mushy. Plop the gnocchi one by one into the pot and let them sit in that boiling water until they come back up to the surface of the water.
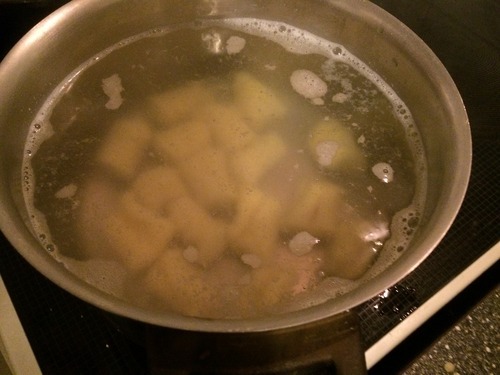
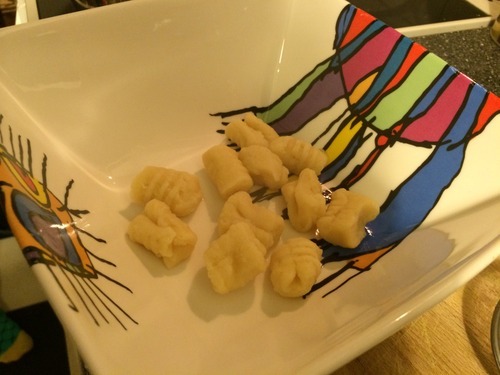
Promptly remove the gnocchi when it surfaces. We ended up using a tea strainer because we did not have one of those ladle things with the little holes in it. Honestly anything works as long as it strains the gnocchi as you remove it from the water. Once you’ve taken it out of the water, it’s ready to be eaten. We collected all of ours in a bowl first.
If you’re freezing your gnocchi, you will want to place them first on a baking pan or tray and sprinkle the gnocchi with flour. Put the pan/tray in the freezer and wait for the gnocchi to get hard. This will make it so that they won’t stick together when you move them into a bag (or bags if you’re portioning it out) for easier freezer storage. They will stay good for two months.
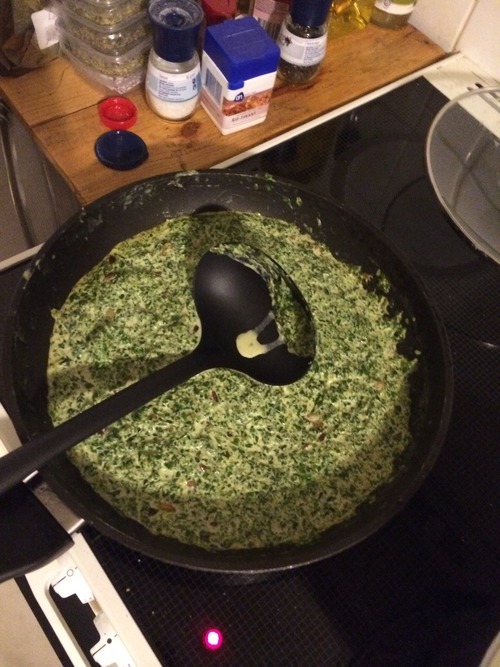
Last but not least, Job cooked up a creamy spinach sauce with pine nuts, garlic, parmesan cheese, spinach and crème fraîche.
Quick Cooking with Him – Spinach Cream Sauce with Pine Nuts
I was already running a little late from work and Hannah just let me know that the potatoes for the gnocchi were almost done. This was great news for me because it not only meant less work for me when I came home after a long day, but it also meant I had less time to make a gnocchi sauce that I hadn’t even decided on yet.
Lucky enough I am Dutch and I learned how to multitask while biking. So after I did some acrobatic moves and put my gloves in my backpack, I was Googling on my bike (don’t do this by the way!) for gnocchi sauce recipes. I didn’t really find what I was looking for but it gave me an idea.
So after a quick stop at the Albert Heijn I went home with the ingredients that would hopefully make a nice and really quick sauce.
Ingredients:
I melted some butter in a skillet (on medium heat) and added about two tablespoons of pine nuts and just cooked them until they were light brown. Then I added one minced garlic clove to the pine nut butter mix.
After that I added about 100ml crème fraîche and half a pack of frozen spinach. I then changed the heat to low. When the frozen spinach had melted and mixed with the crème fraîche I added 50g of parmesan cheese and flavored with salt and pepper where needed.
The sauce really was super easy and we were probably done in 10 minutes.
—-
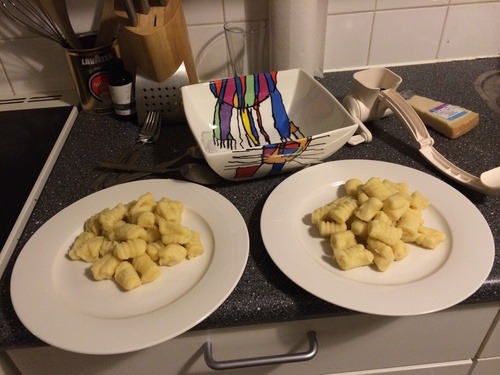
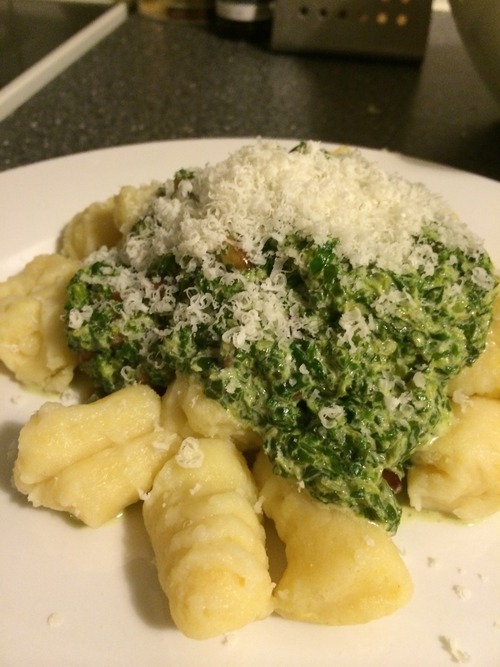
So how did they taste?? Seriously the most delicious gnocchi i’ve had. I’m not sure if it was the sauce Job made or the satisfaction that I didn’t cook bad gnocchi’s, but they were light and fluffy, they weren’t gummy or mushy and they had such a fresh flavor. I honestly can’t wait to make them again. Also, our frozen batch was just as good as the fresh batch! I definitely recommend this recipe and hope you all enjoy because we sure did!

Hannah is a 24 year old passionate young woman. She just moved to Amsterdam in January 2014 to live with her lovely Dutch boyfriend. She is from Providence, RI in the United States of America. She has a love of crafting, food, fashion, technology and travel. She is a licensed hair dresser and loves to have fun and meet new people, and loves kids.
Job is a 22 year old sophisticated young man. He is sometimes goofy and is very loving. He currently resides in Amsterdam. He loves to cook and loves food.
This is The Traveling Spoons, and we are Job and Hannah.
In October of 2012, the two of us were fortunate enough to have been selected from a pool of hundreds of applicants from our global company for a special project in California. I flew in to California from Rhode Island, the smallest state in the United States, and Job flew in a day earlier, from Amsterdam. The second we met, sparks started flying and before the day was out… well, we kind of started to fall in love. With the group of people we were working with, and a healthy per diem, we had great food, met cool people, and had an amazing time.
About a year before Job and I met, he was sent to London for our company and was put on a significant per diem for his food expenses. During this time, he sauntered around the city looking for posh hot spots with great food. It was all this amazing “free” food that inspired him to start…collecting, we’ll say, spoons from each restaurant he visited. He had this great idea to use the spoons as a sort of a rating tool for his food blog that he was excited to start… but it never really took off when he had the idea.
Fast forward to now… and about 150 spoons later (or something close to that), we are here to work on this amazing blog together. Here we are going to share the amazing food we find and experience together in our travels, from lil’ Rhody to Amsterdam and everywhere in between. We’ll share stories about our travels, recipes we love, recipes we find, recipes we try, and recipes we want to try. We’ll share more of our story together, and most of all, post pictures of all of this amazing food. We hope you enjoy all of this love… love of food, people, traveling, and each other, and maybe even try a recipe or two.
For now though, welcome to The Traveling Spoons! We’re really excited to have you!

#sunset #viewfromthetop #thirdfloorbalcony #stormcloud I think I have to take a picture every evening of our sunset! #thetravelingspoons @thetrvlngspoons @jobbeumer
I have a lot of time to myself here while Job is working. I like to busy myself with familiar things, like working on this blog, or tidying the house, or being creative.
I really enjoy crafting and have really been itching to work on a project. I really like to make hand made gifts, but since I don’t know the area that well yet, I’m not 100% sure where I can get all of the supplies I want and need, especially on a really tight budget.
I decided to use my trusty sidekick, google, and found this blog with a very nice listing of crafty stores in the area. I decided to go to Van Beek because it seemed like the closest thing to a Michael’s or A.C. Moore… I think I went to a smaller Van Beek. It had basic art supplies, like scissors, glue, staplers, rulers, paper cutters, colored paper, markers, pens, inks, pencils, paint, pastels…
I purchased a box of colored pencils, a glue stick, a hot glue gun, glue gun cartridges, a red metallic marker, and a silver metallic marker.
My friend Ayla got me a package of awesome blank cards with a colorful frame.
I stopped by the local Bruna which is a store that sells books and cards. I purchased some stamps, and some gem stone/rhinestoney things.
I decided I was going to make some personalized cards.
When I got home, I opened up the Pages application on my computer and found a nice font that I liked. From there, I wrote the names of people I wanted to send cards to.
From there, I would very lightly sort of sketch out the name with one of the colored pencils. 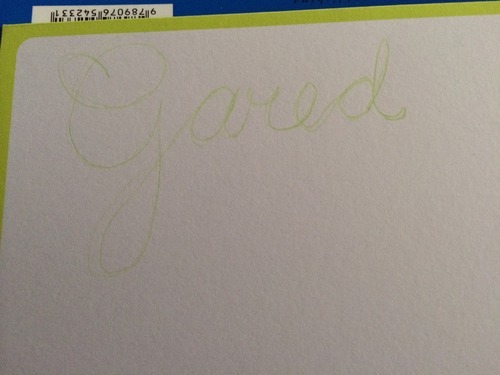
I then went over the sketch a few times with the same pencil,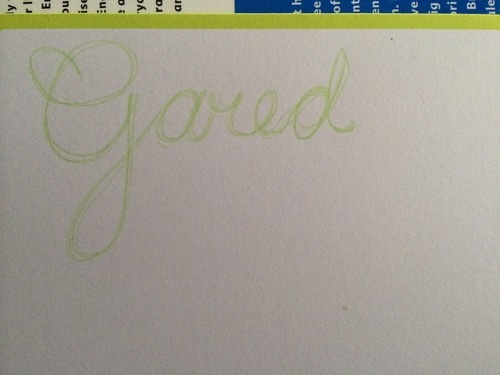

and then would use other colors very similar to make a nice blended color and thicken the name.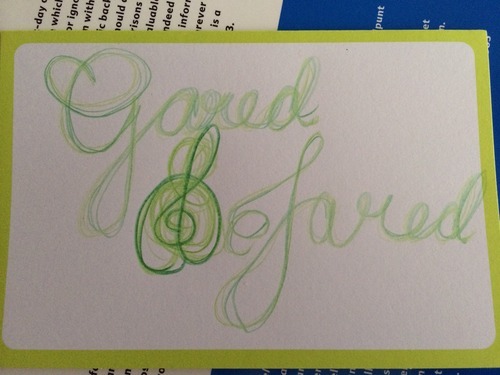
I added some fun gem stones to the card and then would proceed to write my friends a nice letter.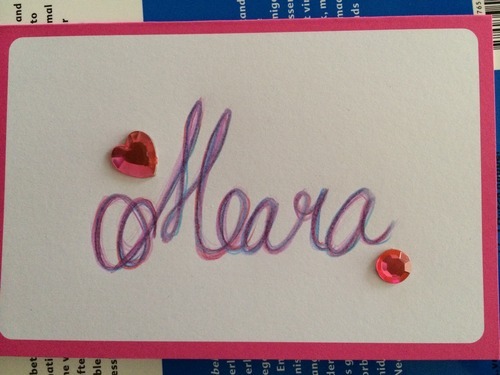
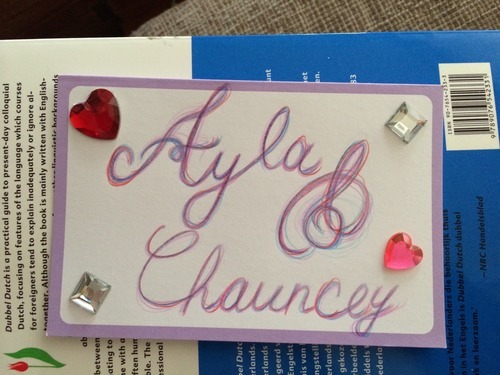
It’s a really easy and simple craft project that doesn’t make too much of a mess and doesn’t take too long to create.
If you’d like a nice personalized card, just send us your address to either thetravelingspoonsblog@gmail.com or jobandhannah@gmail.com
or..Write us a letter and we’ll write you back!

Sunset from our balcony. #sunset #nofilter #thetravelingspoons @thetrvlngspoons @jobbeumer
Like you, Job and I are human and we cannot perfect every delicacy that we make. We have been trying so desperately hard to create an amazing steak dish with no success.
First we tried to make some horseradish steak tips with mashed potatoes and broccoli in October…
Although it looks pretty good, they were less than appetizing and super tough and over-cooked, and the potatoes were not quite cooked enough. The only thing that worked was the sauce the meat was cooked in and the broccoli. Well we thought we had learned our lesson with cooking steak and wanted to take another go at it.
We went to C1000 (another local grocery store) and bought some peppered steak that looked beautiful. We were both really excited for this dinner.
As sides, we decided again broccoli and potatoes would be good. (We bought 10kg of potatoes at C1000 because they were buy one get one free 5kg bags for about €3.)
We steamed the broccoli which was the easiest part of the meal.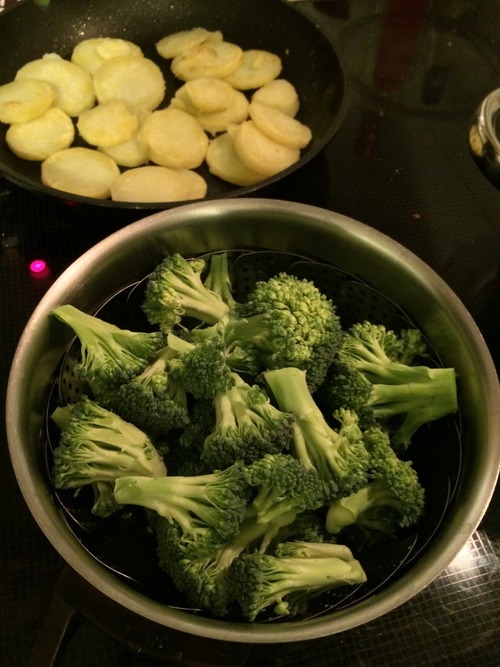
We worked on the potatoes throughout because potatoes take forever to cook. Before Job got home from work, I got to work on the potatoes. We chose four large potatoes to work with.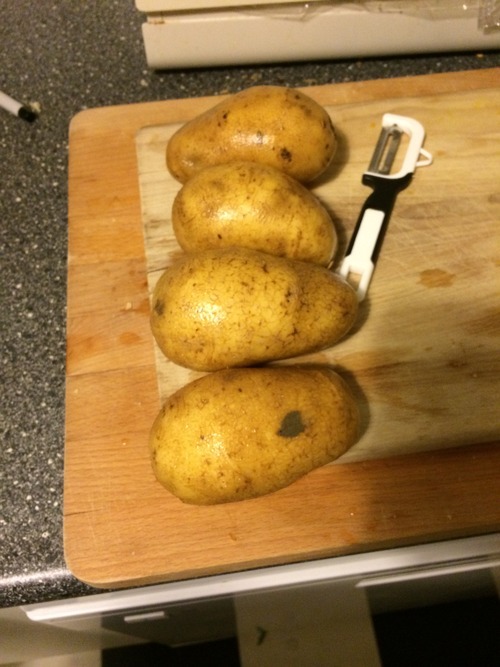
I wasn’t quite sure what sort of thing we were doing with the potatoes, so I asked Job, and he told me just to peel them and we would figure out when he got home what to do next.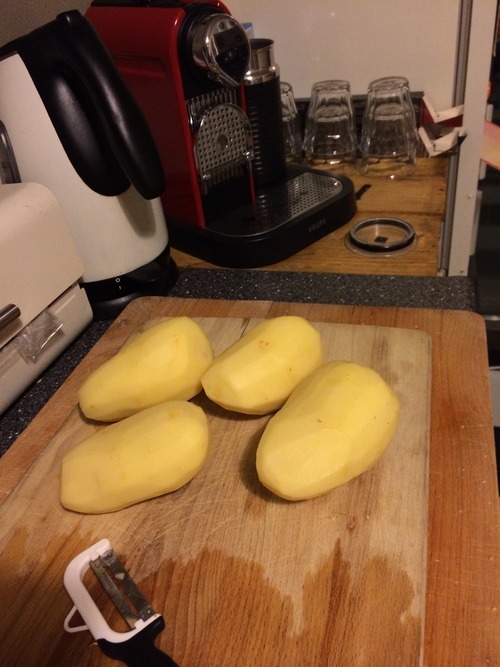
He arrived home shortly thereafter and sliced the potatoes into 1/4 inch thick disks.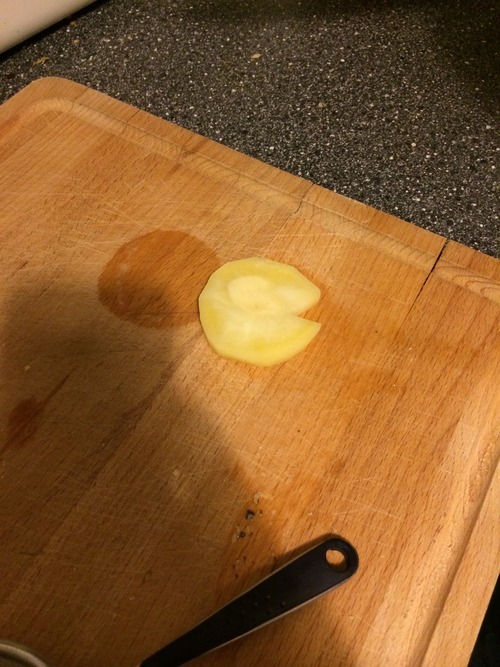
From there, we placed them into a pot of water and waited for it to boil. We let them boil for about 10-15 ish minutes, until they were slightly tender, but not soft enough to make mashed potatoes.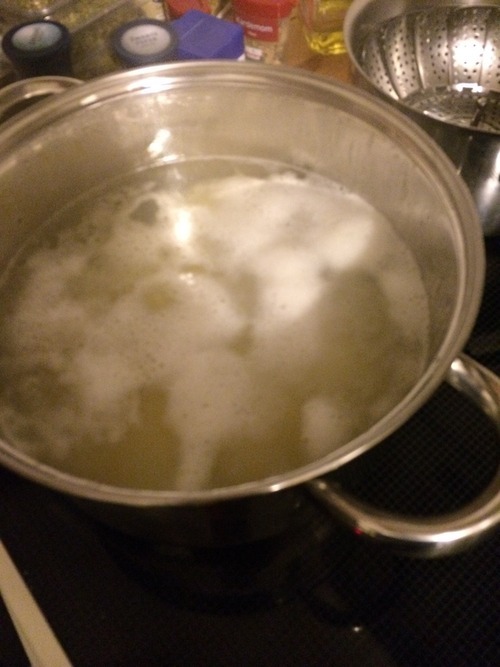
While the potatoes were boiling, we made a garlic bread… I know this sounds ambitious, but we just bought one of those prepared breads that you stick in the oven… It held us over while we continued to cook our potatoes.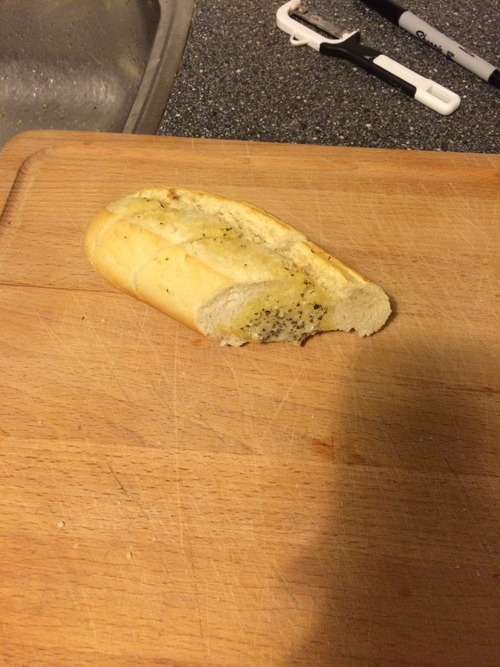
Next we drained the potatoes and let them sit to dry for a few minutes while we prepped a frying pan.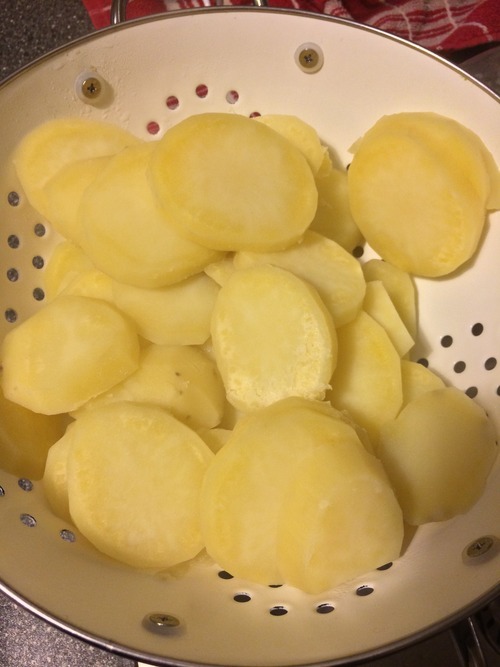
We heated the pan up with some hot oil and then proceeded to put the potato disks into the pan. Basically you want to coat the pan with potato disks. 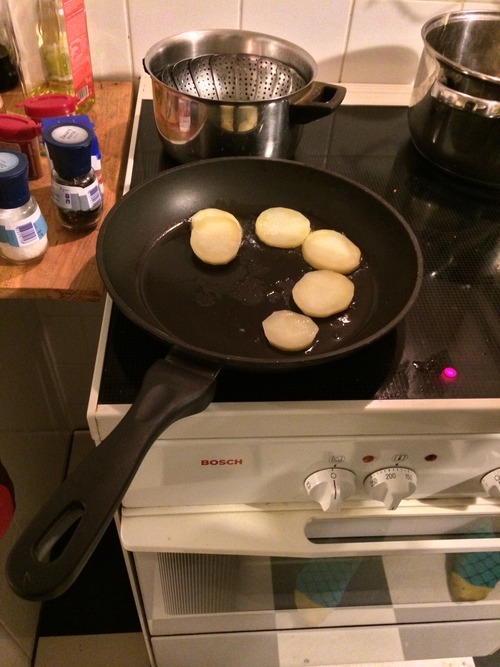
Add oil liberally so that the disks sort of fry up and turn a golden brown color.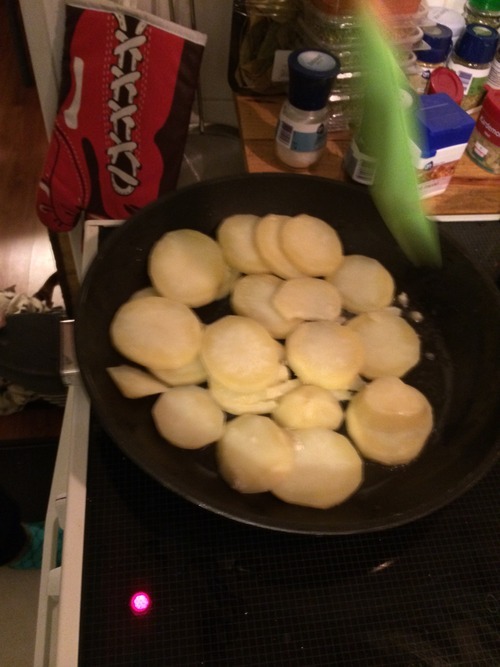
(^^Action Shot^^)
When they are cooked to your desired soft or crispiness, remove from frying pan and shake with seasonings… salt, pepper, what have you.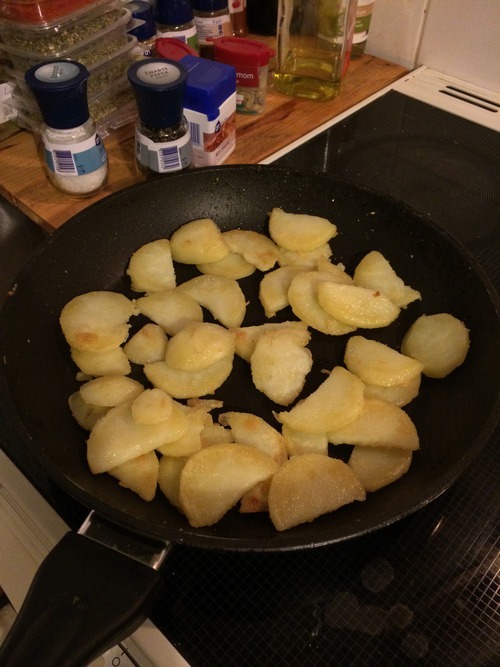
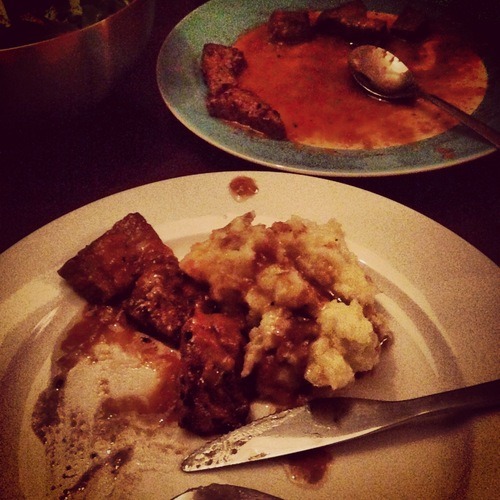
Next we moved on to our steak.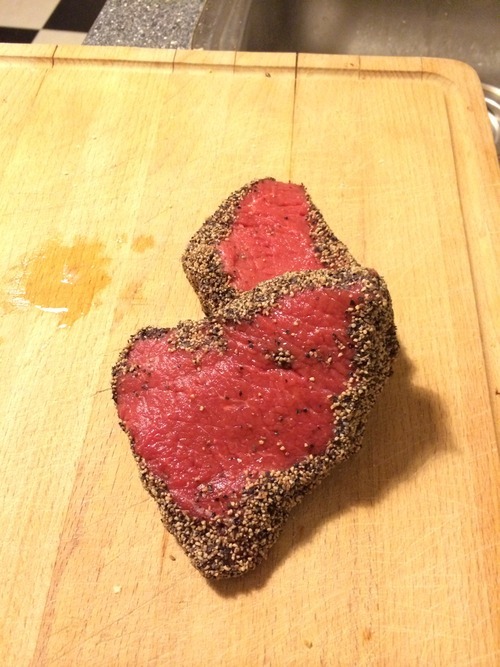
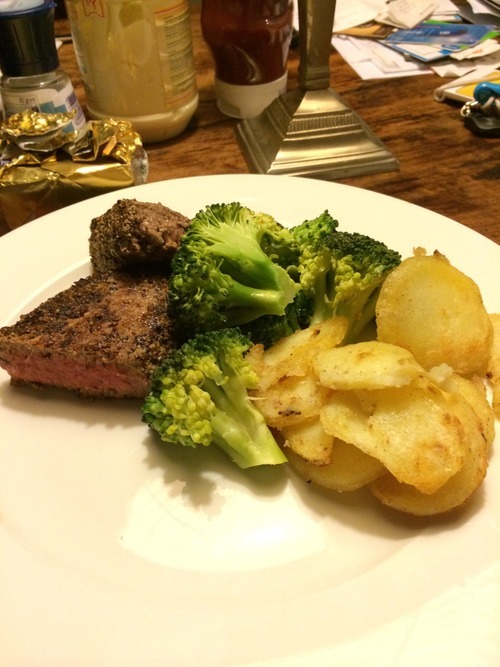
(They’re gorgeous aren’t they??)
Now mind you… neither of us, especially me knows a whole lot about steak or cooking steak, and Job has had a few successful forays into cooking the meat. We heated and added the meat to the skillet, no oil (before Job put the meat in the pan he added some salt and pepper for taste) He cooked them on both sides… (I really don’t know the timing as I wasn’t in the kitchen for this part, but would guess about two minutes each side,) and then removed the steaks from the heat and put them in aluminum foil while we got the table ready. Usually the steak cooks for a few minutes after you remove it from the heat… That is what we learned from our first foray when we cooked our steak tips to what looked like a perfect medium, only to find out that when we cut into them when we sat down to eat, they had cooked themselves into a well done… very tough and chewy.
Well we made sure not to cook these for too long and when they were done, they looked about a medium rare after sitting in the foil for a few minutes, so we put them on the stove for a few more minutes just to get them to a nice medium.
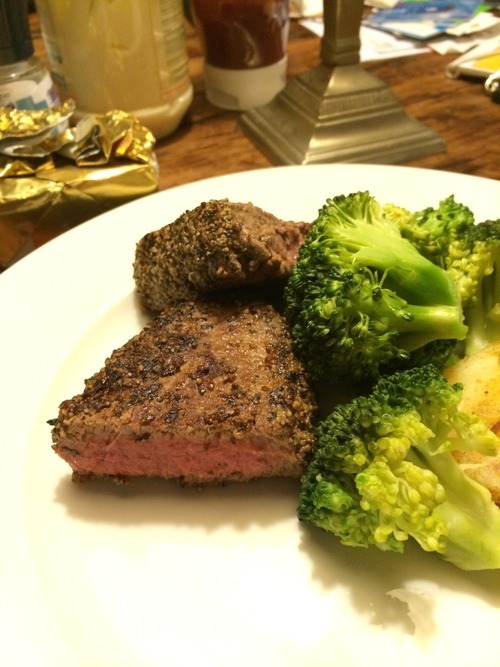
The really did look as though they had been cooked perfectly, but alas as we cut into them and took our first bites, they were so hard to chew and were just not pleasant to eat… Job and I have had some damn good steaks and this was not one of them. The pepper crust it had on the edges was also very spicy. It was just not enjoyable.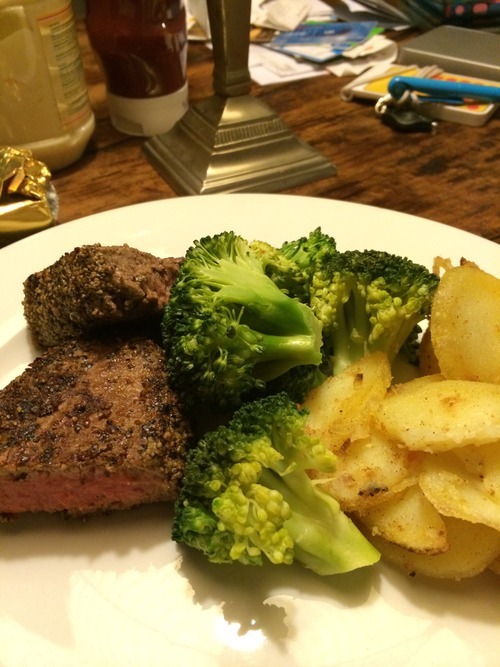
The potatoes and broccoli on the other hand were very enjoyable. The potatoes were basically disk shaped fries, and were very nice paired with ketchup, or as the dutch do, mayonnaise (I’m not a huge mayo fan.. so I stuck with the ketchup) and we also had some apple sauce.
At this point, I think we’ll both be taking a break on cooking steak until we have more knowledge… or go to a restaurant to eat it there.
Let us know if you have any steak cooking tips in the Suggestions tab or send us an email at thetravelingspoonsblog@gmail.com !
