Steak-Tastrophy

Like you, Job and I are human and we cannot perfect every delicacy that we make.  We have been trying so desperately hard to create an amazing steak dish with no success.

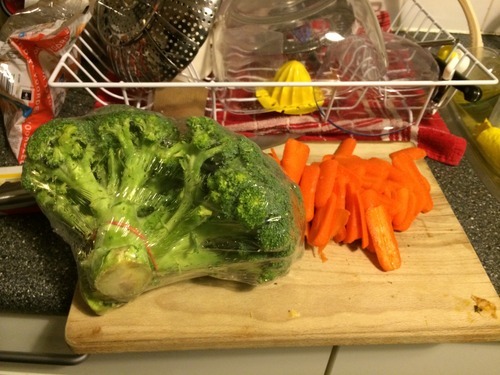
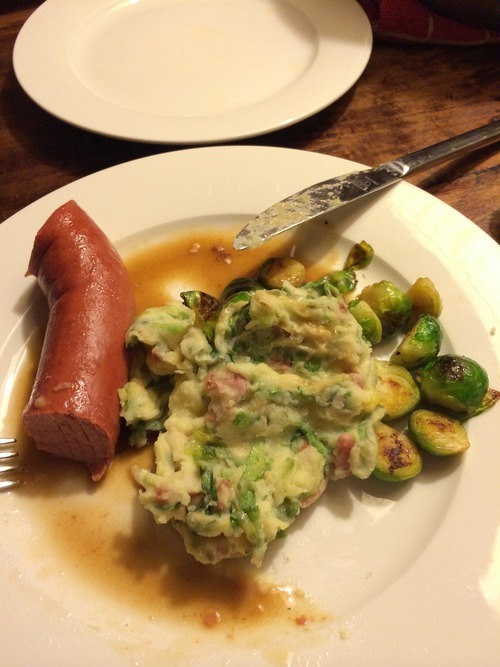
First we tried to make some horseradish steak tips with mashed potatoes and broccoli in October…

image

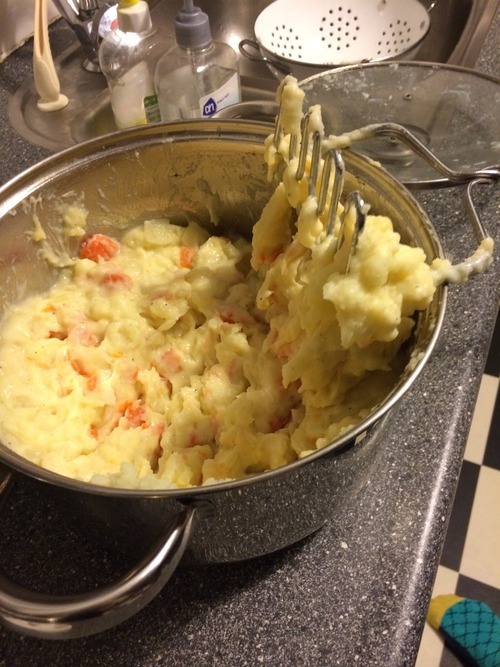
Although it looks pretty good, they were less than appetizing and super tough and over-cooked, and the potatoes were not quite cooked enough.  The only thing that worked was the sauce the meat was cooked in and the broccoli. Well we thought we had learned our lesson with cooking steak and wanted to take another go at it. 

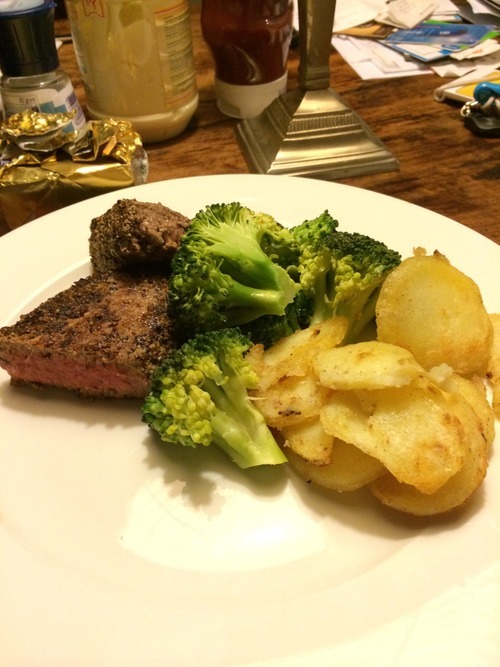
We went to C1000 (another local grocery store) and bought some peppered steak that looked beautiful.  We were both really excited for this dinner.

As sides, we decided again broccoli and potatoes would be good.  (We bought 10kg of potatoes at C1000 because they were buy one get one free 5kg bags for about €3.)

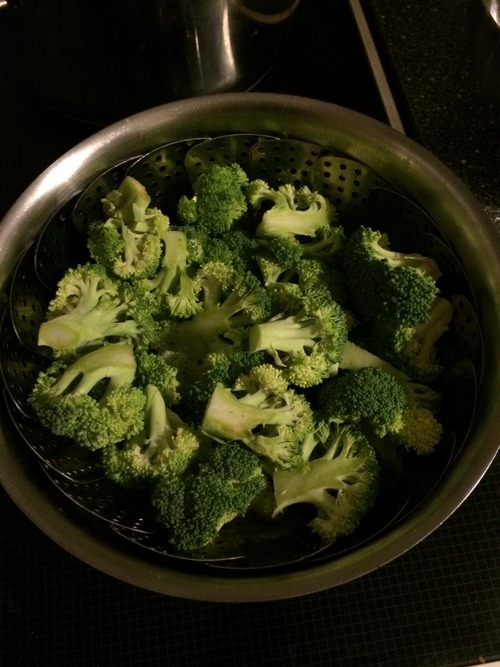
We steamed the broccoli which was the easiest part of the meal.image

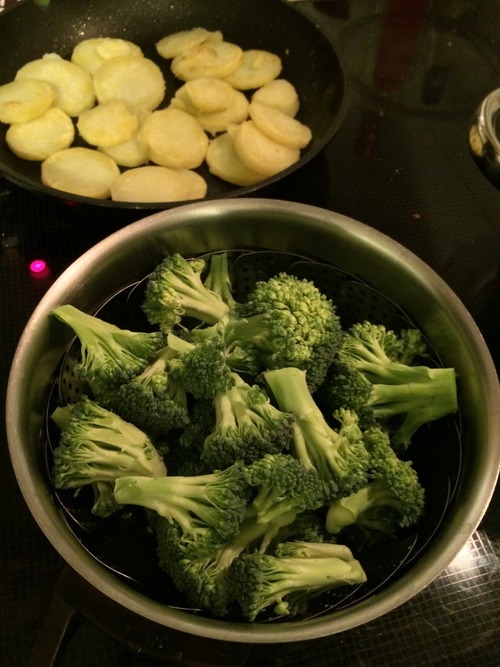
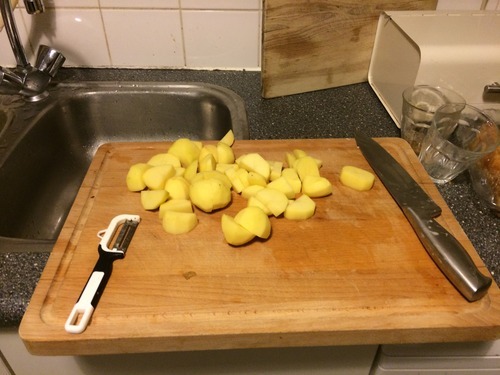
We worked on the potatoes throughout because potatoes take forever to cook.  Before Job got home from work, I got to work on the potatoes.  We chose four large potatoes to work with.image

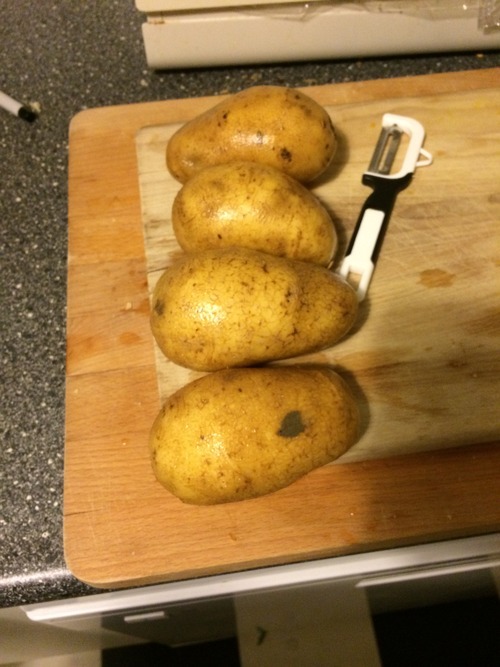
 I wasn’t quite sure what sort of thing we were doing with the potatoes, so I asked Job, and he told me just to peel them and we would figure out when he got home what to do next.image

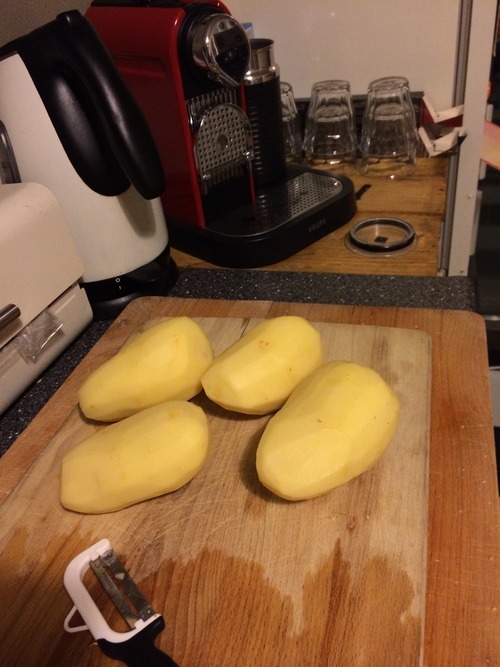
He arrived home shortly thereafter and sliced the potatoes into 1/4 inch thick disks.image

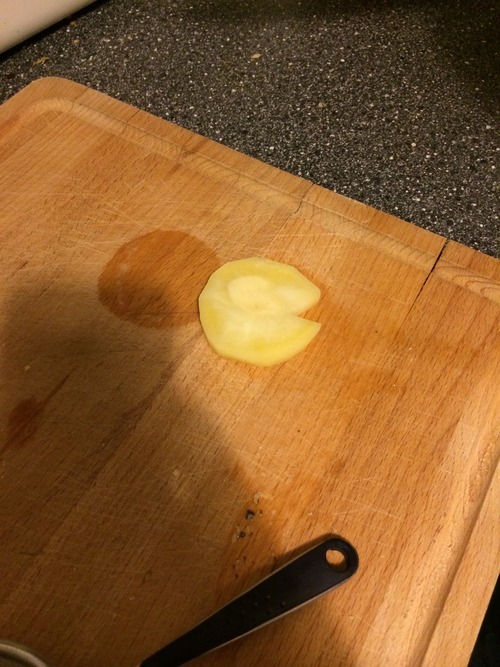
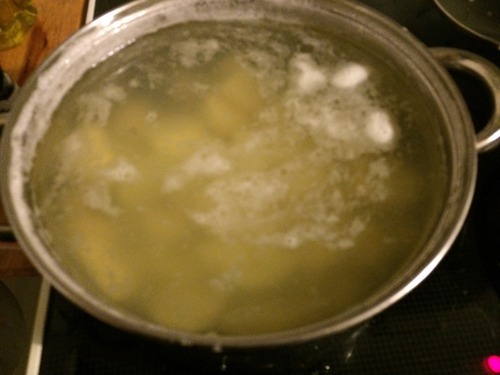
From there, we placed them into a pot of water and waited for it to boil.  We let them boil for about 10-15 ish minutes, until they were slightly tender, but not soft enough to make mashed potatoes.image

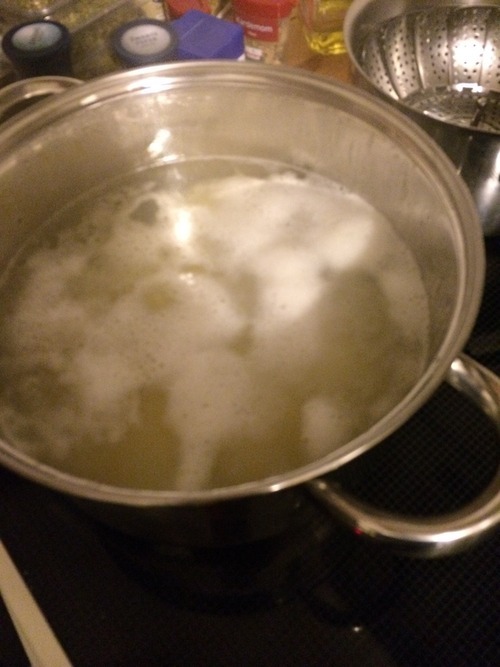
While the potatoes were boiling, we made a garlic bread… I know this sounds ambitious, but we just bought one of those prepared breads that you stick in the oven… It held us over while we continued to cook our potatoes.image

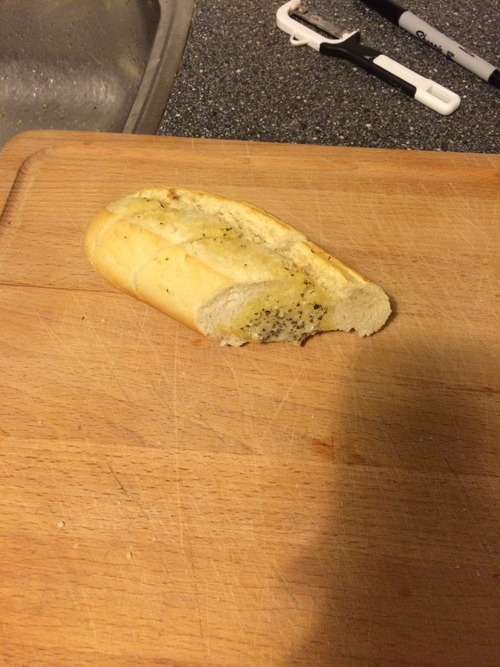
Next we drained the potatoes and let them sit to dry for a few minutes while we prepped a frying pan.image

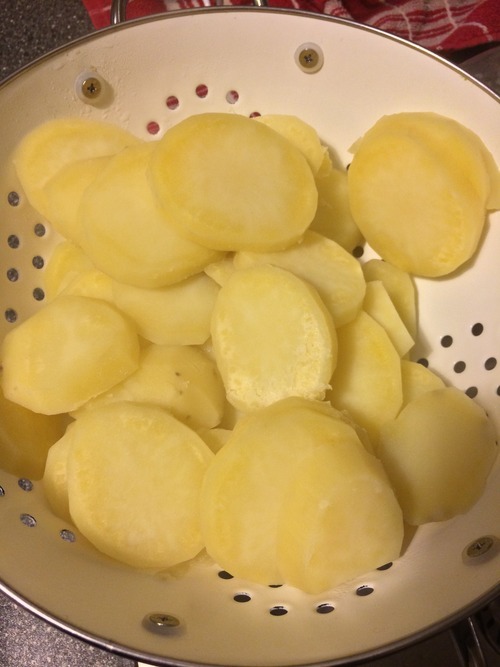
 We heated the pan up with some hot oil and then proceeded to put the potato disks into the pan.  Basically you want to coat the pan with potato disks.  image

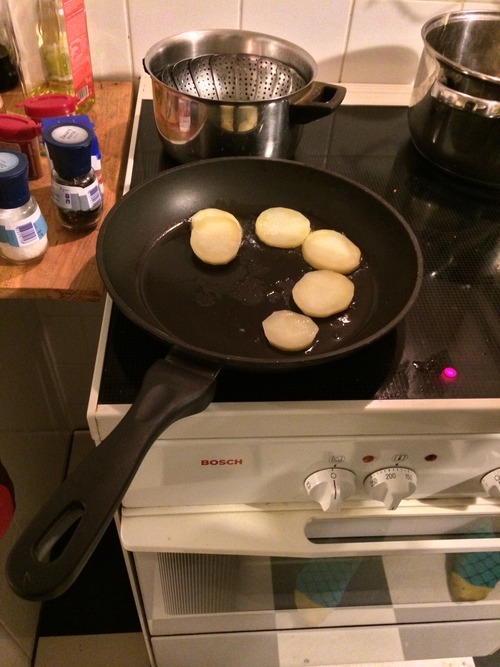
Add oil liberally so that the disks sort of fry up and turn a golden brown color.
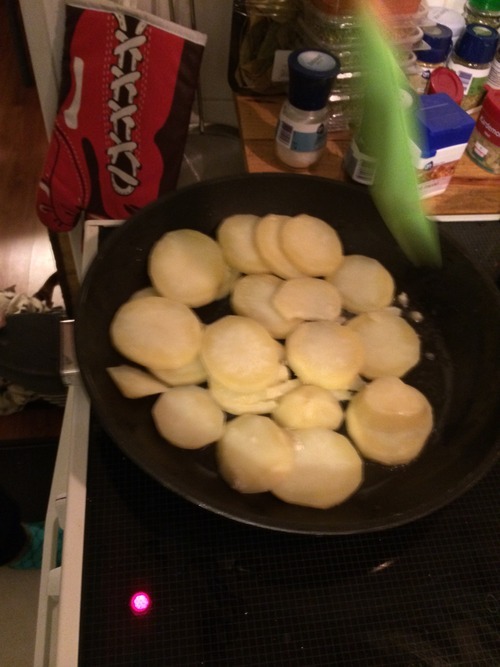
image

(^^Action Shot^^)

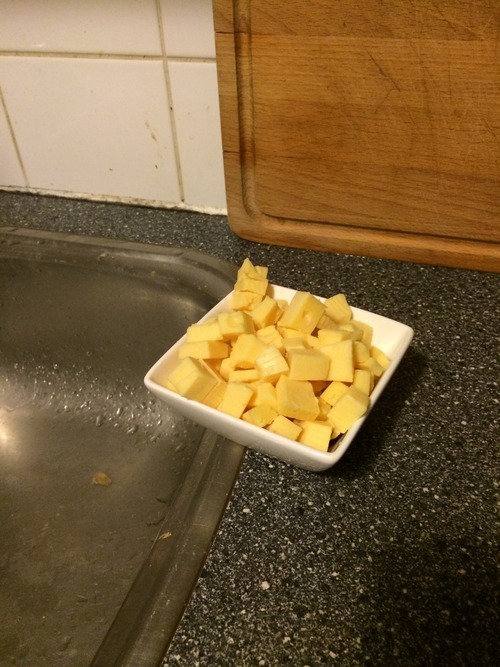
When they are cooked to your desired soft or crispiness, remove from frying pan and shake with seasonings… salt, pepper, what have you.image

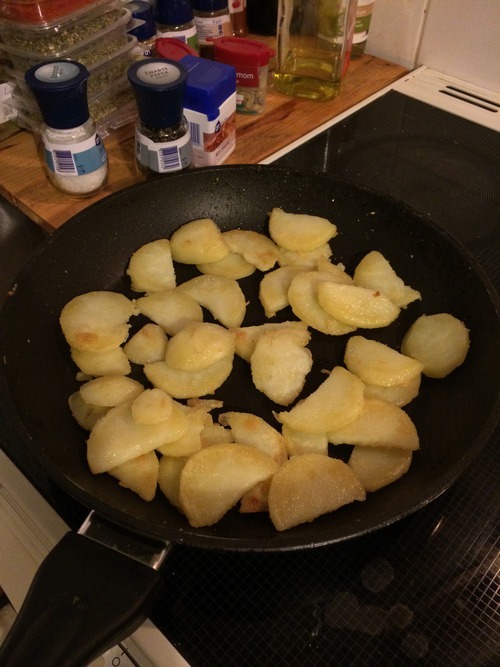
Next we moved on to our steak.image

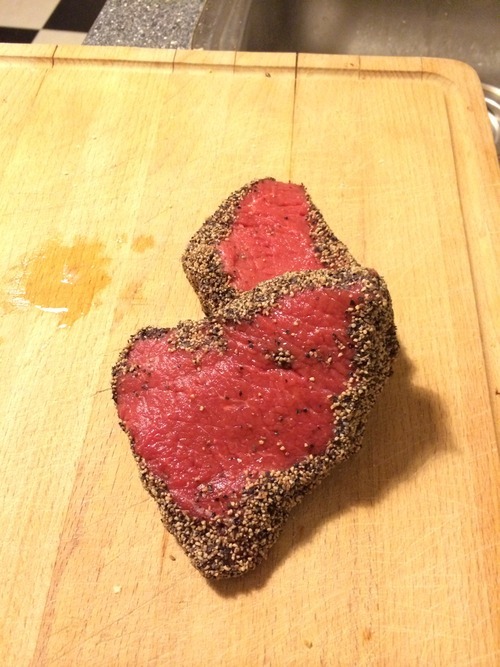
(They’re gorgeous aren’t they??)

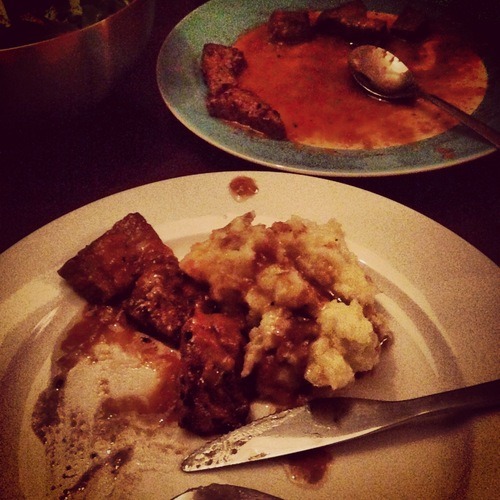
Now mind you… neither of us, especially me knows a whole lot about steak or cooking steak, and Job has had a few successful forays into cooking the meat.  We heated and added the meat to the skillet, no oil (before Job put the meat in the pan he added some salt and pepper for taste) He cooked them on both sides… (I really don’t know the timing as I wasn’t in the kitchen for this part, but would guess about two minutes each side,) and then removed the steaks from the heat and put them in aluminum foil while we got the table ready.  Usually the steak cooks for a few minutes after you remove it from the heat… That is what we learned from our first foray when we cooked our steak tips to what looked like a perfect medium, only to find out that when we cut into them when we sat down to eat, they had cooked themselves into a well done… very tough and chewy.

Well we made sure not to cook these for too long and when they were done, they looked about a medium rare after sitting in the foil for a few minutes, so we put them on the stove for a few more minutes just to get them to a nice medium.

image

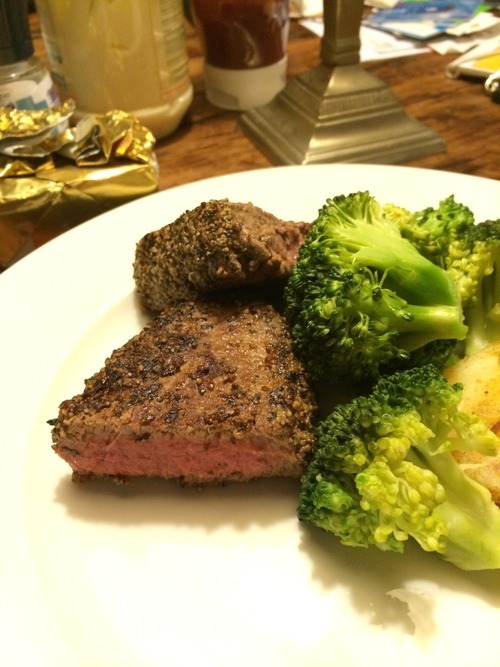
The really did look as though they had been cooked perfectly, but alas as we cut into them and took our first bites, they were so hard to chew and were just not pleasant to eat… Job and I have had some damn good steaks and this was not one of them.  The pepper crust it had on the edges was also very spicy.  It was just not enjoyable.image

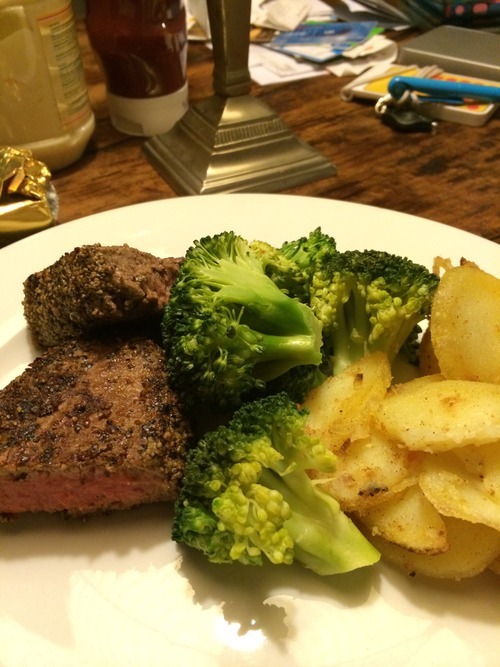
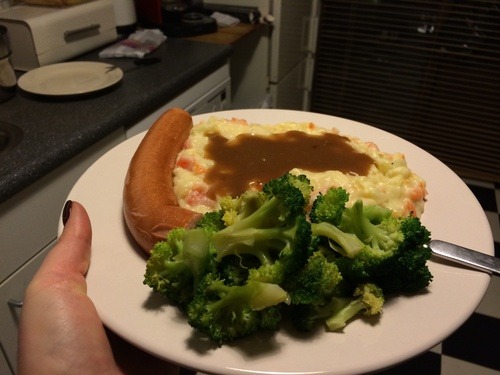
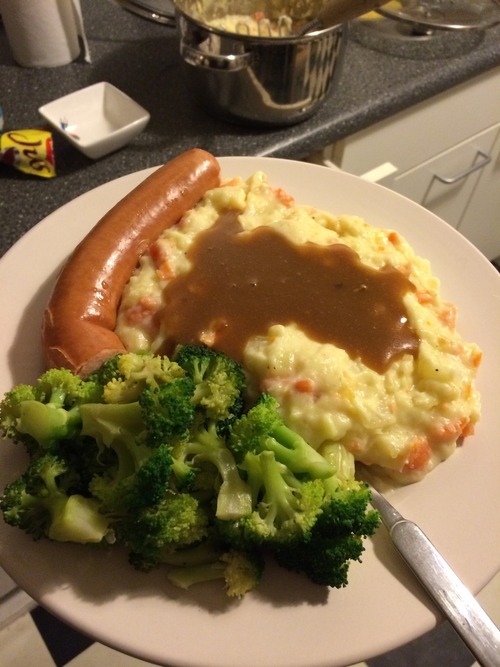
The potatoes and broccoli on the other hand were very enjoyable.  The potatoes were basically disk shaped fries, and were very nice paired with ketchup, or as the dutch do, mayonnaise (I’m not a huge mayo fan.. so I stuck with the ketchup) and we also had some apple sauce.  

image

At this point, I think we’ll both be taking a break on cooking steak until we have more knowledge… or go to a restaurant to eat it there.

Let us know if you have any steak cooking tips in the Suggestions tab or send us an email at thetravelingspoonsblog@gmail.com !

Stamppot Round Three: Hutspot

The Decision of Dinner

As we checked our food inventory the day before, we noticed that we had some produce that needed to go soon… one of those things being a large bag of potatoes. They were starting to grow.  We decided to make one of my new favorite meals, Stamppot, which is something like a bunch of mashed potatoes and some sort of vegetable mashed all together with some cheese and bacon bits and usually there is a rookworst (smoked sausage is what it translates to… but not 100% if that is what it is…?) on the side. We also had some broccoli and carrots and onions in the house so Job decided that we would make Leiden Stamppot, or Hutspot.  Job grew up in Leiden so I was really excited to help him make this special dish.

image

For more information about the history of Hutspot, click Here and Here.

While Job was working, I went out to the market to grab a few things we needed.  We needed some young cheese, some bacon cubes and some butter.  I went to the local Albert Heijn, which is the supermarket around the corner from our house.  I was successful in gathering some cheese and some butter, but the store was all sold out of bacon cubes.  I sent Job a quick message that the store was all out and asked if he could pick some up on his way home.  He responded with of course and I went back to gathering a few other treats.

Ingredients:

These are the main ingredients of any stamppot dish.  What differentiates the stamppots are the different vegetables you mix with the mashed potatoes, cheese and bacon.  So far I’ve had Endive Stamppot, Kale Stamppot and now this Leiden Stamppot (carrots and onions)

A lot of potatoes, peeled and sliced into 1 inch blocks (I would say that I used probably 10-15 potatoes)

Bacon cubes

A small bowl full of young cheese (A: Young cheese is generally a gouda cheese aged for about 2 months.  You can substitute with Cheddar or jack cheese.  It is not a super intense flavor.  Pretty mild. B: if you have a large block of cheese, I used 3 fingers width of the block.  Job usually uses 2 thumbs worth, but I think 3 of my fingers is about 2 of his thumbs, but you can see the pictures of the amount we used.)

Carrots, chopped

Onions, chopped

1 Packet of Stamppot Jus (I’m sure there is a recipe to make your own stamppot gravy, but we always just buy a packet that you add butter and water to)

4 Tbsp of Butter

Salt and Pepper to taste

2 Tbsp of Milk

Rookworst

Food Prep

Around 6PM, I decided it would be a great idea to start cooking the potatoes for the stamppot because they take forever to cook.  I peeled the 10-15 potatoes…image

with our left handed peeler (a very tough thing to do when you’re right handed, and I made a mess)image

and cut the potatoes into 1 inch blocks… well 1 inch chunks? They definitely weren’t blocks. While I was peeling and cutting, I put a large pot of water on the stove to boil.  Once all of the potatoes were peeled and cut up, I put them into the pot of water.image

 Once the water boils, time the pot for 20 minutes.  When 20 minutes is up, the potatoes should be soft and a spoon or fork should be able to glide through.  Basically you want to make them soft enough to mash, and then just pour out the water they boiled in.

While my potatoes were cooking, I cut up the cheese and put it aside in a small dish.image

Next, I would have cooked up the bacon cubes, however when Job went to stop at the Albert Heijn on his way home to see if we could get some bacon, his bike lock didn’t work and so he couldn’t go inside. This is what they look like uncooked and in a package:image

(I also found a picture from when I made the Kale Stamppot of the bacon sitting in a dish lined with paper towel to soak up some extra grease)image

Oh well, no bacon for our stamppot this time, but what you normally do is you put a small package of bacon cubes in a pan and cook them up until they are crispy. (I like a bacon a lot and so does Job, so we usually use both sides of the package)  You can then use the leftover bacon grease for your stamppot jus instead of butter.  

Since the potatoes take so long to cook, this is usually when I prep the other veggies, but since I had never made this variation of stamppot before and didn’t want to mess anything up, I just kept my potatoes drained and covered and waited for Job to come home so that he could show me how to prepare the other things.

If you’re making a stamppot with a leafy vegetable like Kale or Endive, you would just want to make sure the leaves are cut up into small strips or squares and that there are no stems and ribs, and then you just mix it into your mashed potatoes, cheese and bacon.

When Job arrived home, I let him know that I had already cooked the potatoes and asked him what still needed to be done.  We had to slice up the carrots and the onions.  We used two small onions and about a half of a bag of baby carrots. We also decided to use up our broccoli as a side veggie. image

Job put a medium sized pot on the stove with water and a bouillon cube for some added flavor to our veggies. image

He put the carrots and onions in the boiling water and placed a steamer basket on top and filled it with our broccoli so we could cook all the veggies at once.image

While they were cooking, I started to mash the potatoes.  I always add a large chunk of butter, probably about a tablespoon or two to the mash and probably about a tablespoon or two of milk as well, to make it extra creamy.  Then, I added in our cheese cubes, and would normally add in the bacon cubes as well. image

 Because the potatoes are so hot from boiling, they just melt everything in there.  I always also add a little salt and pepper for taste. I added a little cayenne pepper for some kick.  Next we added in the carrots and onions that we boiled as well as some of the water that we boiled it in because it was so flavorful.  It also helps to meld the mash together.image

In a pan on the stove, I then melted some butter to make the jus packet, about 2 tablespoons of butter lightly browned, then add in the packet with about a glass of water, and just let it thicken up.image

Lastly we just had to cook up our Rookworst in the microwave and we cut it in half and dinner was ready to be served.image

As usual, the stamppot was super tasty and filled us both right up, and we have plenty left over for lunch and dinner!image

And in case you were wondering how our other stamppots turned out…

Endive Stamppotimage

Kale Stamppotimage

Rosemary Garlic Chicken and KALE!

It neared closer and closer to 7PM… the time Job would be home.  We had discussed earlier in the day while he was working that we would be making some kind of chicken for dinner. 

image
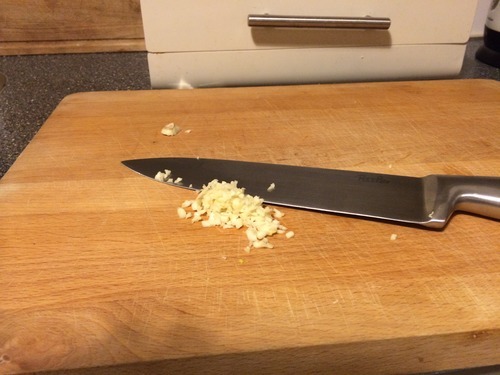
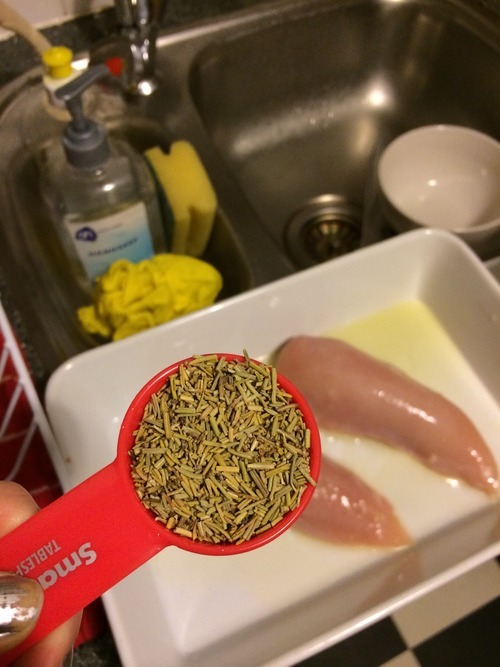
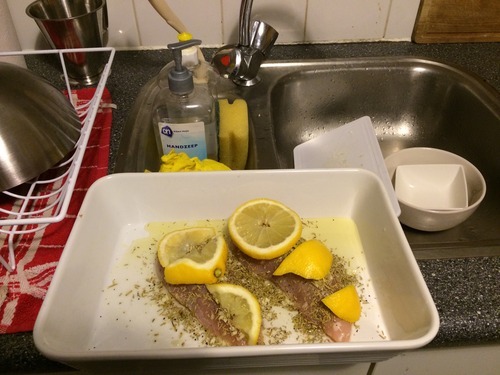
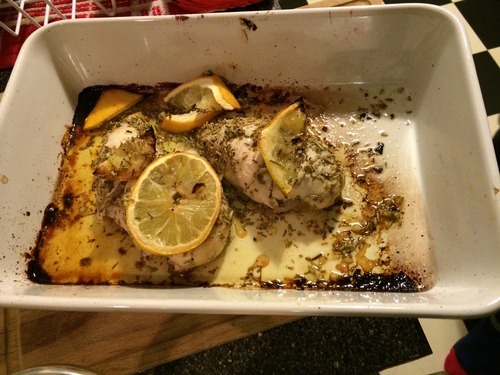
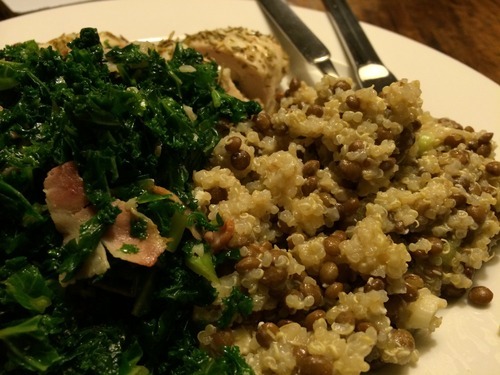
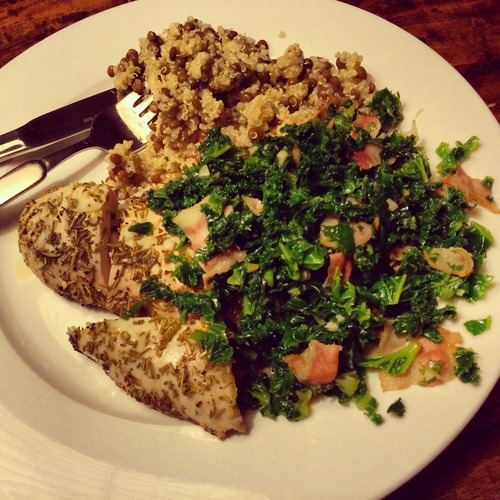
As he arrived home and settled in, we started throwing around ingredients to decide what we wanted to make for dinner.  I had been having a rosemary craving for a couple of days and suggested some sort of rosemary garlic chicken.  He agreed, but neither of us had a recipe to go from, just thoughts of what we wanted our food to taste like when it was done, so I hopped on the internet… and I found this recipe. 

It seemed super easy and we had all of the ingredients.  Before we started, I looked over a few reviews and noticed that they had all suggested a few things that we took into mind while creating our dish.

We prepped 2 boneless chicken breasts, chopped up some lemons, squeezed out some lemon juice, found a nice little baking dish and got to work.

Ingredients:

2 Boneless Skinless Chicken Breasts

1 Large Clove of Garlic, Chopped

1 Tablespoon of Dried Rosemary

1 Tablespoon of Lemon Juice

Salt and Pepper to Taste

Olive Oil

1/2 Lemon

Prep Time: 5-10 Minutes

Cook Time: 25-30 Minutes

First we preheated the oven to 375.

Next we squeezed out some lemon juice, and sliced the lemons and chopped up some garlic.  imageWe also set aside 1 TBSP of dried rosemary.image

We put a small amount of olive oil in the baking dish.  

Next we laid down the two chicken breasts side by side, evenly scattered the garlic and dried rosemary on top, added some salt and pepper, and poured the lemon juice over the breasts.  We laid the lemon slices on top of chicken breasts to keep the moisture in.

image

We placed the dish in the oven and set a timer for 12 minutes.  Many of the reviewers recommending covering the dish half way through cooking with a sheet of foil to make sure the meat stayed moist throughout cooking.

We ended up cooking the chicken for about 30-35 minutes.  The recipe says 25 minutes, so it depends on your oven.  Just make sure the juices run clear.  (We also cut into our chicken just to be safe.)

image

While the chicken was baking, we moved on to our side dish, which we also found here.

Ingredients:

1 Bundle of Kale without stems and ribs (We used a 200g (i think?) bag)

3 Cloves of Garlic, Chopped

Olive Oil

Bacon

Water

Salt and Pepper to taste

Prep Time: 5 min

Cook Time: 5 Min

For this recipe, we loosely followed the instructions and kind of made up our own rules. We cut down on the garlic because Job was afraid he would have garlic breath and had to work the next day, and no one wants garlic breath at work.  We also added some bacon as some other reviewers had suggested because we love bacon.

While Job was chopping the garlic and the bacon, I put some olive oil into the bottom of a large cooking pot and heated it up.  image

Next I put the kale into the pot.  I added about 2 TBSP of water and put the pot on low heat with a cover.

Job, after chopping up the garlic and bacon placed it into a frying pan to cook the bacon through and brown the garlic a little.image

We then added all of that to the pot with the kale and cooked it on a medium heat for about 5 minutes while continuously stirring.  The kale leaves will turn a bright green and will be wilted once cooked.image

Once we finished our kale, we were just about ready for dinner.  We had some leftover Lentil and Quinoa salad that we used as the grain base for the dish.

image

This is a super easy recipe.

Ingredients:

1 Can Lentils

1 Cup Quinoa (uncooked)

Spring Onions

Feta Cheese

Prep Time: 5 Min

Cook Time: see quinoa instructions on package.

For this recipe, Open up a can of lentils.  If there is an excess of liquid in the can, pour it out.  Pour the lentils into your serving bowl.

Next, cook up a cup of quinoa, making sure first to wash the quinoa to remove the bitter taste. 

While the quinoa is cooking, chop up some spring onions.

Add the spring onions to the lentils.

Once the quinoa is done cooking, add that into the bowl as well and crumble some feta cheese on top.  Mix well and you’re done!

image

So… how was dinner?

Well, the chicken was super super moist and tasted so fresh.  The rosemary was not overpowering at all, and neither was the garlic, which is good because no one wanted to have garlic breath.

The kale was zesty and not too garlic-y either, which was perfect.

The Lentil and Quinoa salad perfectly balanced out the meal with a less acidic taste compared to the garlic of the kale.  Everything was super tasty and I would definitely eat this one again!image

If you have any questions or comments about the dish, please feel free to write to us and let us know how everything turned out!

Cucumber Noodles

After realizing tonight that I didn’t have any real food at home Hannah pointed me to a recipe for Cucumber Noodles over at Epicurious.com.

I’ve never cooked cucumbers but I gave it a shot. And as it turns out it’s pretty decent.

For one portion I used:
– One cucumber
– One or two tbsp of unsalted butter
– Two tsp of freshly cut mint or mint sauce
– Two tsp of lemon zest
– One tbsp of lemon juice
– Salt and pepper

First thing you do is cut the cucumber with some sort of vegetable cutter until you have something like this.

image

Cook the cucumber for 1 minute in salted water. Take off the heat and drain in a colander. Put the colander with the cucumber in cold water to stop cooking.

image

On a medium heat melt the butter and add some salt.

image

When foam subsides add the cucumber with the lemon juice, lemon zest and mint. Toss to make sure it’s cooked evenly. Take off the heat after about 1 minute.

image

Cooking the cucumber first in water and then in the butter gives it a completely new texture that makes it a perfect substitute for regular noodles. The skin doesn’t change texture as much as the rest of the cucumber so if you want to make it even better, take off the skin before cutting it to noodle size.

You can use it as a substitute for normal noodles or as a side dish.

image

Job